
Freeze-Up Prep · Alaska Fluid Guide
Alaska Freeze-Up Fluid Guide: Six Driveway Checks Before the First Cold Snap
By Fredric Riech · 907 Synthetics · Wasilla, AK · (907) 350-7366
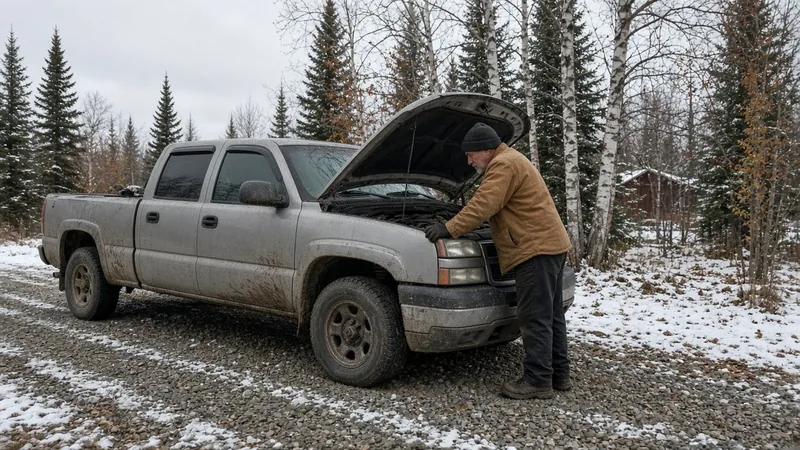
Every fall there is a short window up here. The leaves are down, there is a skiff of snow on the ground, and it is still warm enough that you can stand in the driveway with the hood up and not lose feeling in your fingers. A few weeks from now that window closes. The first real cold snap comes in, the truck has to start at twenty below, and whatever was marginal in October turns into a problem in the dark on the Glenn.
That is why I like to do one simple pass over the fluids in early November. Not a full service — a look. Six fluids, about half an hour, and you will know whether your rig is ready for winter or needs some attention while it is still comfortable to give it.
I am Fredric Riech with 907 Synthetics in Wasilla. Here is the local, plain-language version: what to look at, what the level and color can and cannot tell you, and when to stop and let a shop take it.
Safety first: Do most of these checks with the engine off and cool, parked on level ground with the parking brake set. Never open a hot radiator or coolant cap. If any check means getting under the vehicle, support it on jack stands rated for the weight — never on a jack alone — and chock the wheels. Your owner’s manual is the boss: the fluid type, the check procedure, and the service interval for your vehicle come from the manufacturer, not from me or anyone else’s blog.
Why Fall Is Fluid Time in Alaska
- Cold changes everything. Fluids that were fine in July get thicker and slower in January. An oil that is the wrong grade or overdue, or coolant that has been diluted with water, shows its weakness on the coldest morning of the year.
- Our summers are hard work. Towing the boat, hauling the side-by-side up a gravel road, long highway runs to Kenai or Fairbanks — most of us drive in what manufacturers call severe service, even if we do not think of it that way.
- Winter is the wrong time to find out. A leak, a low reservoir, or a tired fluid is a fifteen-minute fix in the driveway now. In January it is a tow, a cold wait, and a shop that is already booked out.
1. Engine Oil
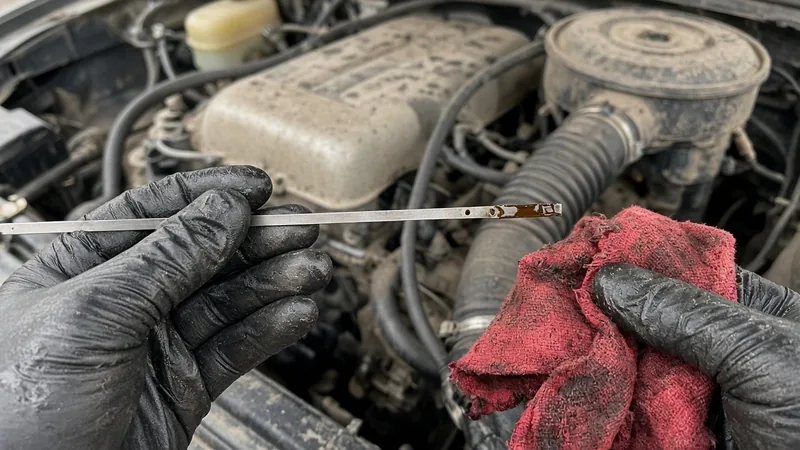
Start with the one you already know. With the engine off for a few minutes on level ground, pull the dipstick, wipe it, put it back fully, and pull it again. The oil should sit between the two marks. If it is low, top it up with the grade your manual calls for and keep an eye on it — an engine that suddenly starts using oil is worth a conversation with a mechanic.
Two winter questions matter more than color. First, are you due? If your next change lands in December or January, do it now in the garage instead of later in the cold. Second, is it the right grade for winter? Many manuals list a low first number (like a 0W) for cold climates because it flows faster on a cold start. Follow what the manufacturer specifies for your temperatures; my Alaska oil viscosity guide explains what those numbers mean.
2. Coolant (Antifreeze)
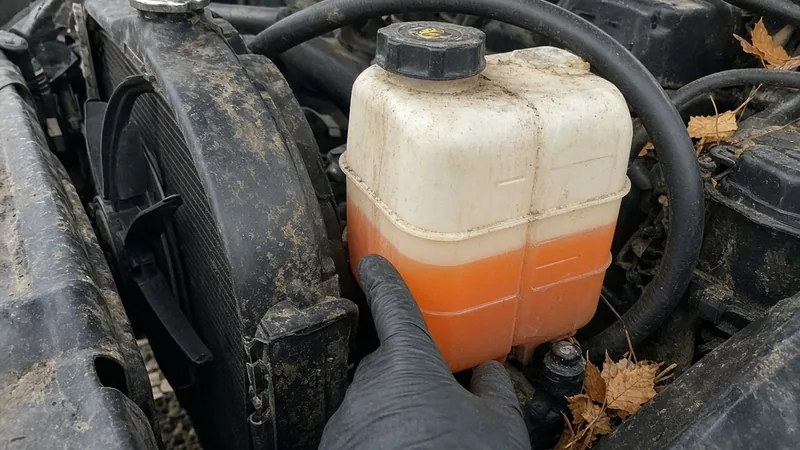
This is the one that protects your engine block from literally freezing, so it is the one I would never skip in Alaska. With the engine cold, check the level in the overflow reservoir against its MIN and MAX marks. Then look at the fluid itself: it should be clean and clear in its normal color, not rusty, muddy, oily, or full of floating bits.
Level is only half the story. What really matters before freeze-up is freeze protection — how cold the mix can get before it turns to slush. Topping off with plain water over the years quietly weakens it. Most parts stores and shops will test it in a minute and tell you where you stand. If the protection does not cover the coldest temperatures you see, or the coolant is past its service life, it is time for a proper service with the coolant type your manufacturer specifies. Do not mix types without checking your manual.
3. Transmission Fluid
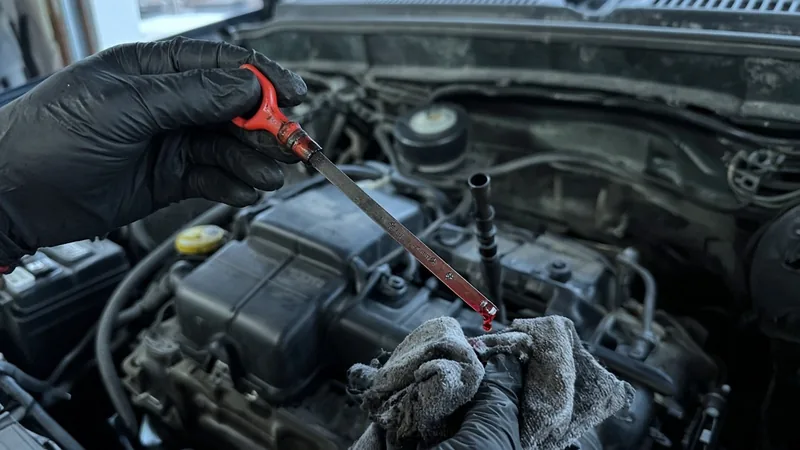
Transmission checks vary more than any other fluid on this list, so this is where your manual really earns its keep. Some automatics still have a dipstick and are checked warm, engine running, in Park. Many newer ones have no dipstick at all and are checked through a fill plug at a specific temperature — that is generally a shop job.
If yours has a dipstick, follow the manufacturer’s procedure exactly, then look closely at the fluid on the stick. Healthy automatic fluid is usually clear and reddish. Dark brown fluid, a burnt smell, or metal glitter on the stick are signs it has had a hard life — towing and long hauls do that. Do not overfill, and if you see warning signs, have it looked at before winter rather than after.
4. Brake Fluid — the Forgotten One
Brake fluid is the fluid almost everybody forgets, and it is the one I would put at the top of the list for older rigs. Most brake fluid slowly absorbs moisture from the air over time. That moisture lowers its boiling point and can contribute to corrosion inside the system, and you will not notice any of it until the pedal does not feel right.
Find the master cylinder reservoir (usually on the driver’s side, near the firewall), wipe the cap clean before you open it so nothing falls in, and check that the level is between MIN and MAX. Fresh fluid is typically clear to light amber; dark, cloudy fluid is due for attention.
A slowly dropping level can be normal pad wear — or a leak. Either way, do not just keep topping it up. Use only the fluid type printed on the cap or in your manual (for example DOT 3, DOT 4, or DOT 5.1), never mix silicone-based DOT 5 with the others, and keep brake fluid off your paint.
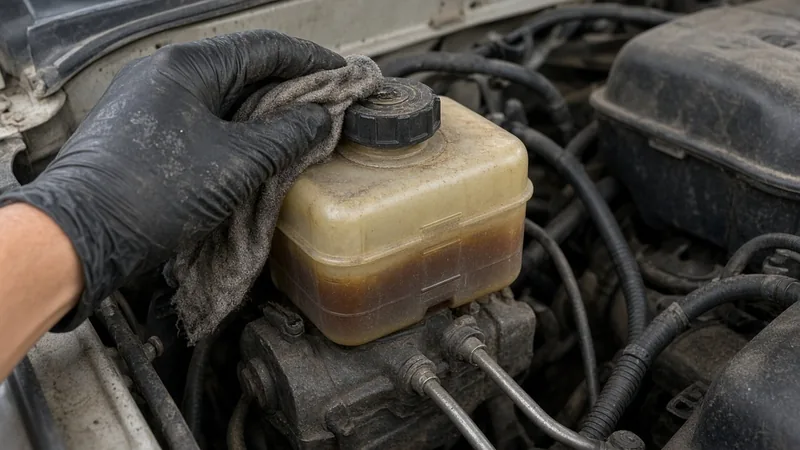
Brake Check, Checklist Level Only
- Pedal feel: firm and consistent, not spongy, soft, or slowly sinking at a stop
- Fluid: between MIN and MAX, not dark or cloudy, correct type per the cap or manual
- Leaks: no wet spots at the wheels, lines, or under the master cylinder
- Warning lights: no brake or ABS light on the dash
- Interval: know when the fluid was last changed — and what your manufacturer recommends
Brakes are safety-critical, so I keep this part at the checklist level on purpose. If the fluid is due, a bleed or flush is a job you can do with the right tools and experience — but if the pedal is soft, a warning light is on, or you have never bled brakes on an ABS-equipped vehicle, take it to a shop. If the pedal does not come right back to firm after any brake work, do not drive it.
5. Power Steering Fluid (Where Fitted)
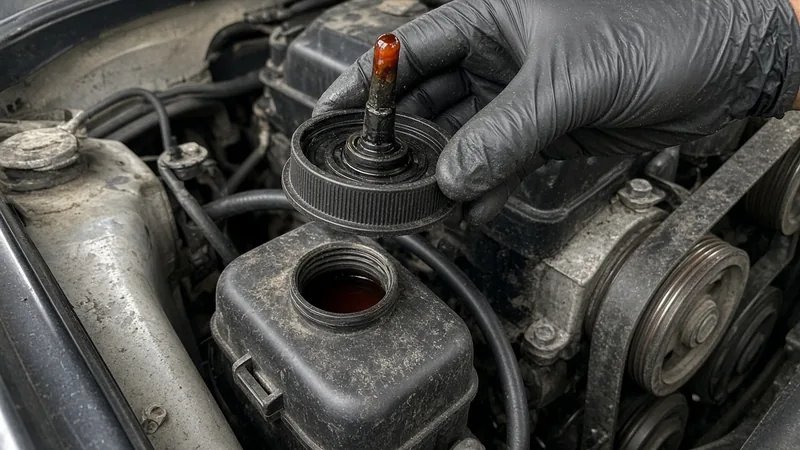
Many newer vehicles use electric power steering and have no fluid to check at all — your manual will say. If yours has a hydraulic system, look for a small reservoir, usually with a dipstick built into the cap. Check it the way the manufacturer describes (some read hot, some cold), keep it between the marks, and use only the fluid specified.
Listen, too. A whine or groan when you turn the wheel, especially on a cold morning, is the system telling you something. I wrote a whole post on this one: how to check power steering fluid, and when to change it.
6. Differential and Transfer-Case Gear Lube
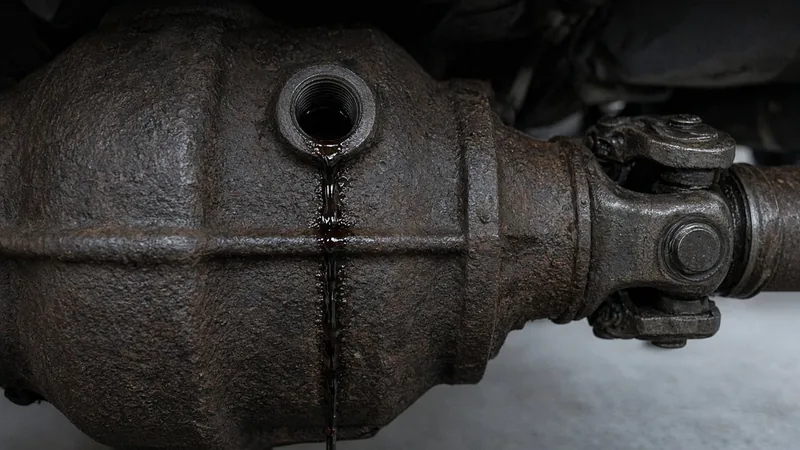
These are the fluids nobody sees. Differentials and, on four-wheel drives, the transfer case do a lot of quiet work on icy boat ramps, gravel roads, and long cold hauls, and water crossings and towing are hard on them. Most do not have a dipstick; they are checked at a fill plug on the side of the housing.
From the driveway you can still do the most useful check: look for leaks. Wet, grimy spots around the axle seals, the differential cover, or the transfer case are worth catching now. If you are comfortable getting under the vehicle on jack stands, the level is typically checked by removing the fill plug — on many housings it should be right at the bottom edge of the hole, but follow your manufacturer’s procedure. One old-timer tip worth repeating: always loosen the fill plug before the drain plug (or the cover, on axles like many GM trucks that have no drain plug), so you are never stuck with an empty housing you cannot refill. Use the gear lube viscosity and specification your manual calls for, nothing else.
When to Hand It to a Shop
There is no prize for doing all of this yourself. Let a shop take it if:
- The brake pedal is soft or sinking, a brake or ABS light is on, or you are not sure how to bleed your system.
- Coolant is oily, rusty, or milky, or the level keeps dropping with no visible leak.
- Your transmission has no dipstick, or the fluid smells burnt or shows metal.
- You find a leak you cannot trace, or gear lube looks milky after water crossings.
- You are short on time. A shop in October or early November is a lot easier to get into than one in a January cold snap.
Supplies, the Local Way
Most of this check takes nothing more than rags, gloves, and a flashlight. If something needs topping off or replacing, get the exact type your manufacturer calls for.
Not sure what your truck, car, sled, or ATV needs? Start with the AMSOIL Product Guide — look it up by vehicle or equipment, and follow the manufacturer’s specification first. If you order through AMSOIL, ask me about becoming a Preferred Customer before you check out. In the Anchorage area, AMSOIL orders can be picked up at Carlile, 1930 Spar Ave.; per AMSOIL order confirmations, pickup orders are generally ready in about 2 hours. More on that in how to buy AMSOIL in Alaska. Wasilla folks, I am local — call or text and I will help you get the order right the first time.
Before Freeze-Up: The Six-Fluid Checklist
- Engine oil: level between the marks, change not due mid-winter, winter grade per the manual
- Coolant: level checked cold, fluid clean, freeze protection tested for Alaska temperatures
- Transmission: checked per the manufacturer’s procedure, no burnt smell or debris
- Brake fluid: between MIN and MAX, not dark, pedal firm, correct DOT type
- Power steering: level OK (if hydraulic), no whine on cold turns
- Diff & transfer case: no leaks at seals or covers, level checked at the fill plug if you are set up for it
- Bonus: washer fluid rated for winter temperatures — you will use a lot of it on the Parks
Half an hour in the driveway now, and the first twenty-below morning of the season is just a cold start instead of a bad day. If you are hauling sleds this winter, my trailer bearing checklist is the natural next stop.
Fluids for This Job
For the fluid most people forget: AMSOIL DOT 3 and DOT 4 100% Synthetic Brake Fluid is made for cars, light trucks, and powersports that call for DOT 3, DOT 4, or DOT 5.1 fluid (not for DOT 5 silicone systems). Confirm the DOT type on your reservoir cap or in your manual first.
For the cooling system: AMSOIL Passenger Car & Light Truck Antifreeze & Coolant is a 50/50 pre-mix for cars and light trucks. Check your manual for the coolant your manufacturer specifies before you add or change anything.
For everything else on this list, look up your vehicle in the AMSOIL Product Guide. These links carry my dealer number so AMSOIL credits 907 Synthetics with your order.
More guides: Choose your drain interval · Cold-climate oil for Alaska · AMSOIL for cars and light trucks · Diesel trucks · Find the right AMSOIL for your vehicle
Related: The Pre-Winter Six-Fluid Check: a Mat-Su driveway walkaround
Questions Before Winter Sets In?
I am happy to help you look up the right fluids for your truck, car, sleds, and wheelers, and to walk through ordering or Anchorage pickup. No pressure, just local help from a fellow Alaskan who would rather see you warm inside than stuck on the shoulder.
Call or text 907-350-7366 — Fredric Riech, 907 Synthetics, Independent AMSOIL Dealer, Wasilla, AK
Did this help? Leave 907 Synthetics a Google review — it helps other Valley folks find local help.